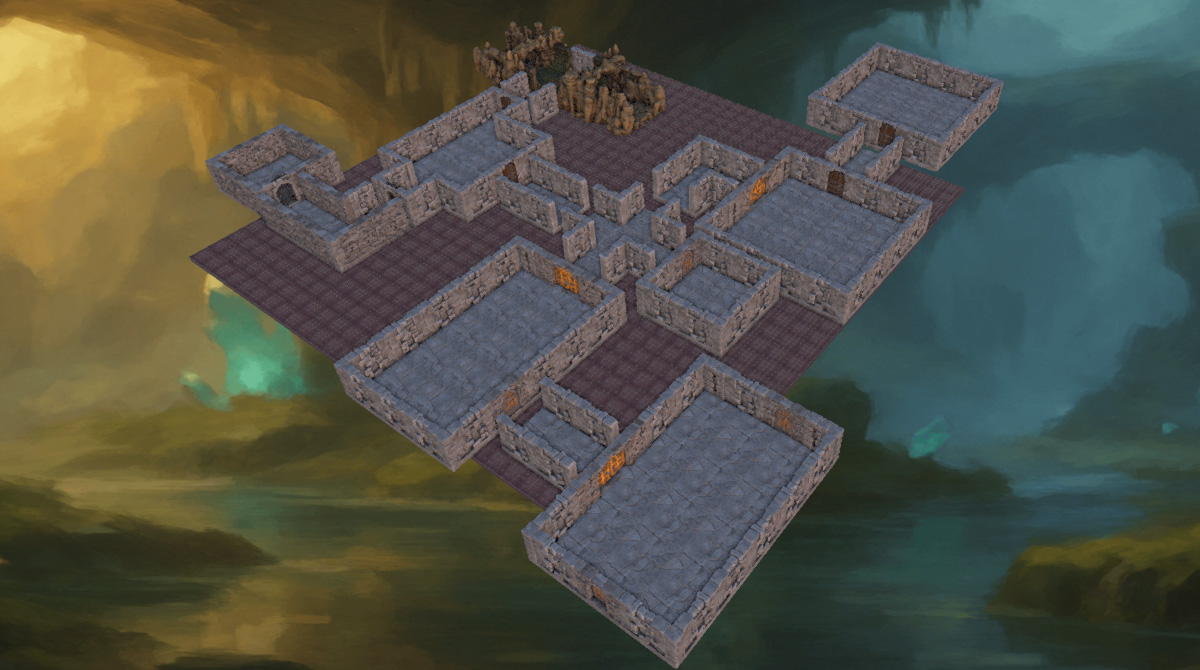
In this article, we will show you how to plan, design, and create, your own 3D printable modular dungeons in Terrain Tinker for Tabletop Games and RPGs.
With Terrain Tinker you can build using standard OpenLOCK tiles and export your creations as STL files of all the individual tile components for you to print. Having many different individual tiles can be great for building infinite kinds of terrain for tabletop games, but it can be easier and quicker to have premade rooms that can be arranged in various ways. Let's have a look at how we do it.
Planning your dungeon
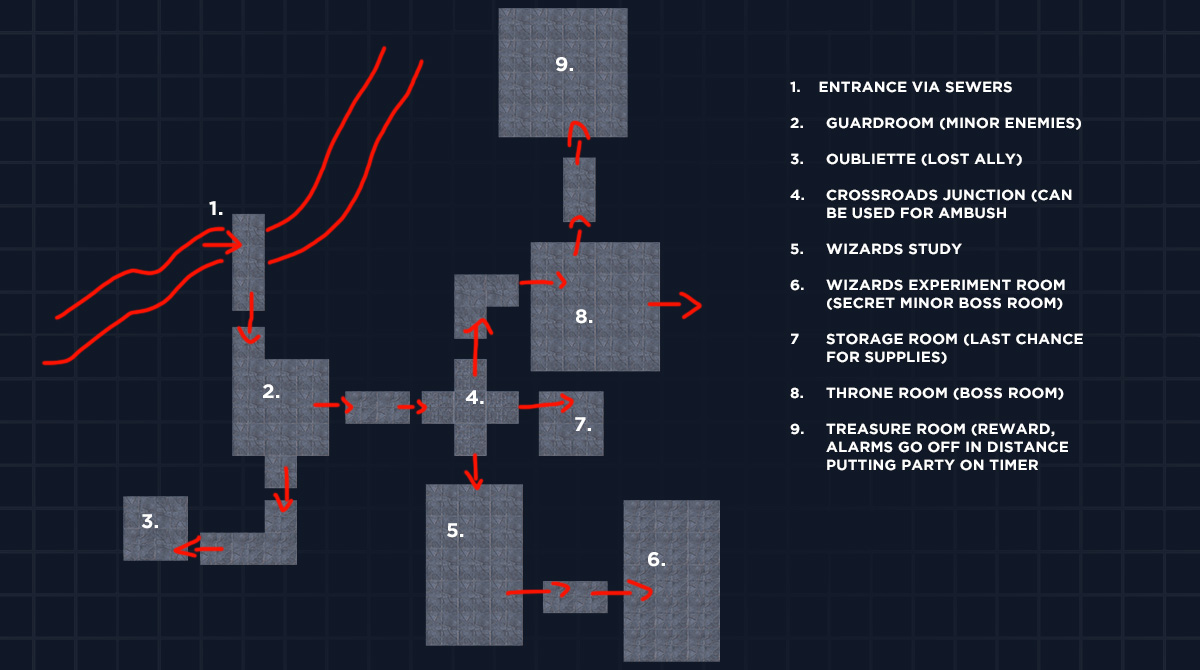
While we’re intending to make this a modular dungeon, a good starting point would be to create a floor plan for your first dungeon. This will give you direction and some story starters for each room.
When planning a dungeon that is going to get reused, think about how it all flows together from room to room. It helps to think of the dungeon room shapes more generically, so they fit together and can be swapped easily. This means you're using the decorations, scatter terrain and enemies to tailor the environment when you want to reuse the room.
Other things to consider when planning the dungeon are different junctions where the party faces choices. Think about which rooms will have encounters and which will have traps. Think about the story each room will tell. Consider how they get to the end of the dungeon and how they will get out without retracing the entire dungeon if need be.
We can then use these rooms later for creating different layouts if we design those rooms and corridors in a way that allows them to be modular.
Designing your rooms
When planning modular rooms and corridors, keep in mind where the connectors are. Between most rooms will be a corridor, which also needs to be modular, attaching to the sides of rooms and leading into the next room. Doors will need enough space between them so the exiting and entering corridors can connect to other rooms. Having doors on the same side may complicate your dungeon design, as this can lead to situations where your build can become trapped within itself. With this, we recommend sticking to having doors on either opposing or adjacent sides.
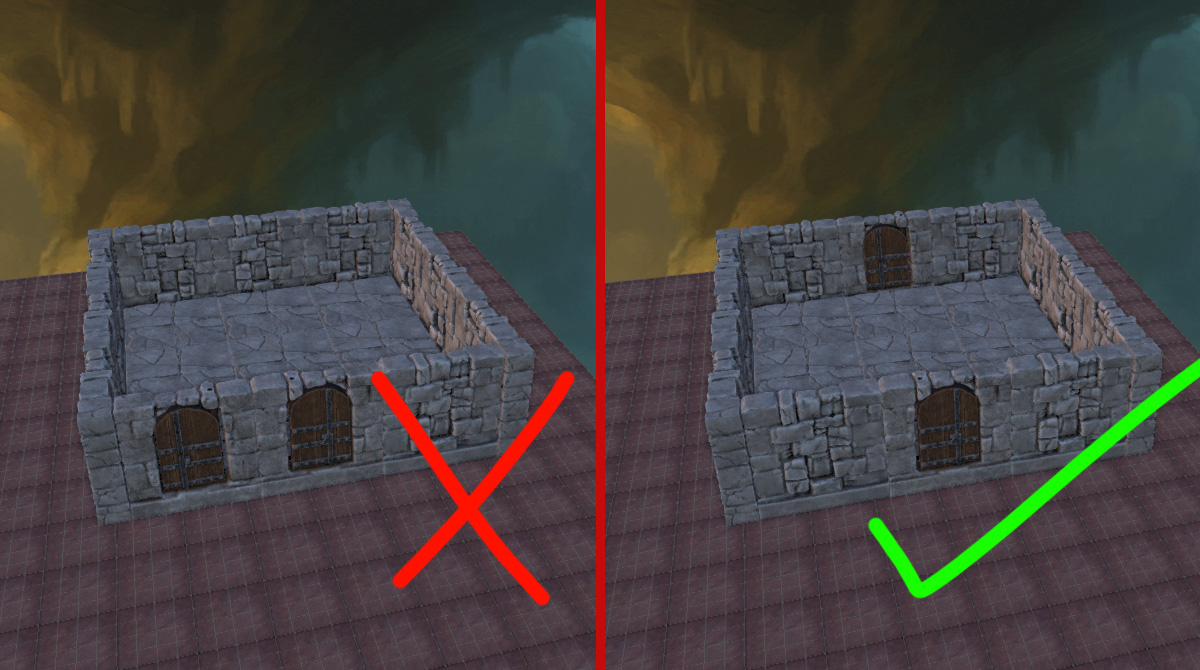
We also recommend putting the doors on the rooms themselves and having the corridors as open-ended joiners. This can also help in the storytelling, as the first impression of a closed room the party will get, will be the door. All they will see when entering a room is closed doors to unknown spaces. The door that leads to the granary will appear different to the door that leads to the oubliette, for example.
To keep your terrain modular, we recommend keeping corridors and door junctions simple and use 2” openings, as this is our standard tile size and will give your party room enough to have two characters standing shoulder to shoulder. Remember to also make the floors and walls flat where they meet a corridor. This may be a simple point to make, but if you decide to create a dungeon first and try to split it later, you may find the joiners difficult.

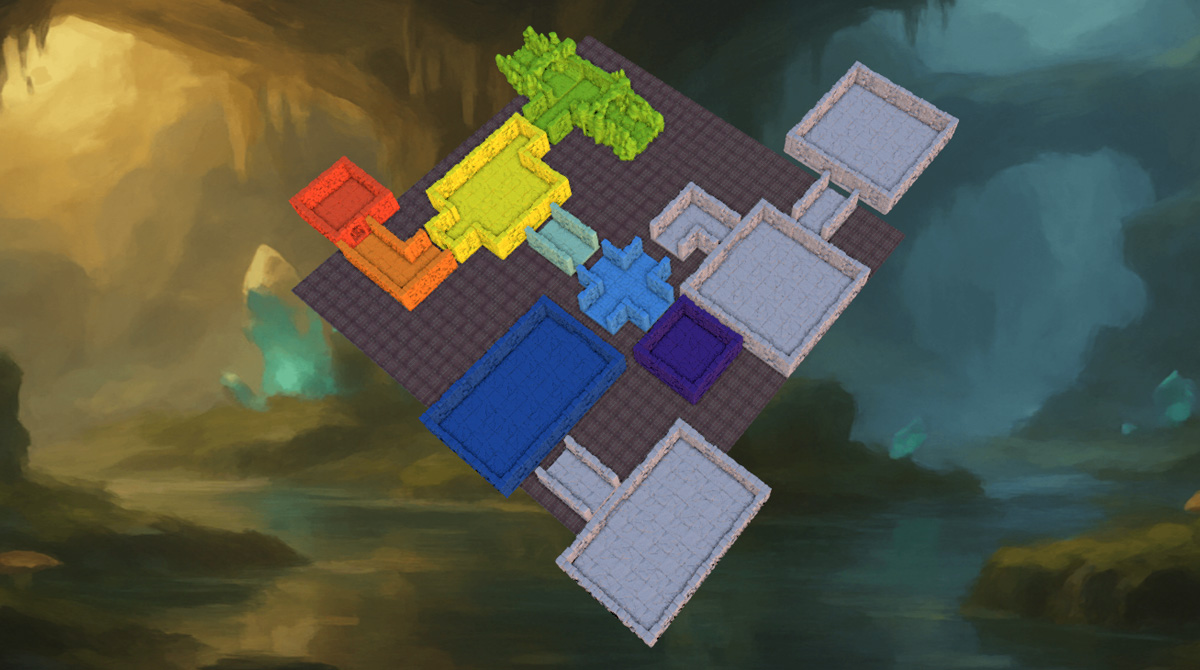
Creating the print groups
Once you have your rooms laid out, you can begin combining them into print groups. Refer to this article for a step-by-step guide on how to do this.
Printing and painting your dungeon
Now you can download these STLs as print groups and send them to your printer and begin the fun part of painting them ready for action.
Hope you found this post interesting. For more tips, be sure to check out our knowledgebase.